
How to Use an eSIM on iPhone
Installing a travel eSIM is only half the story — day to day you'll add plans, scan QR codes, flip between lines and tweak settings. This guide covers everything after (and during) installation: where the eSIM settings live on iPhone, how to scan a QR code properly, what to do when a line is stuck on Activating, and how to keep your home number while using travel data.
If you're setting up your very first eSIM, start with our full activation walkthrough — then come back here for daily use.
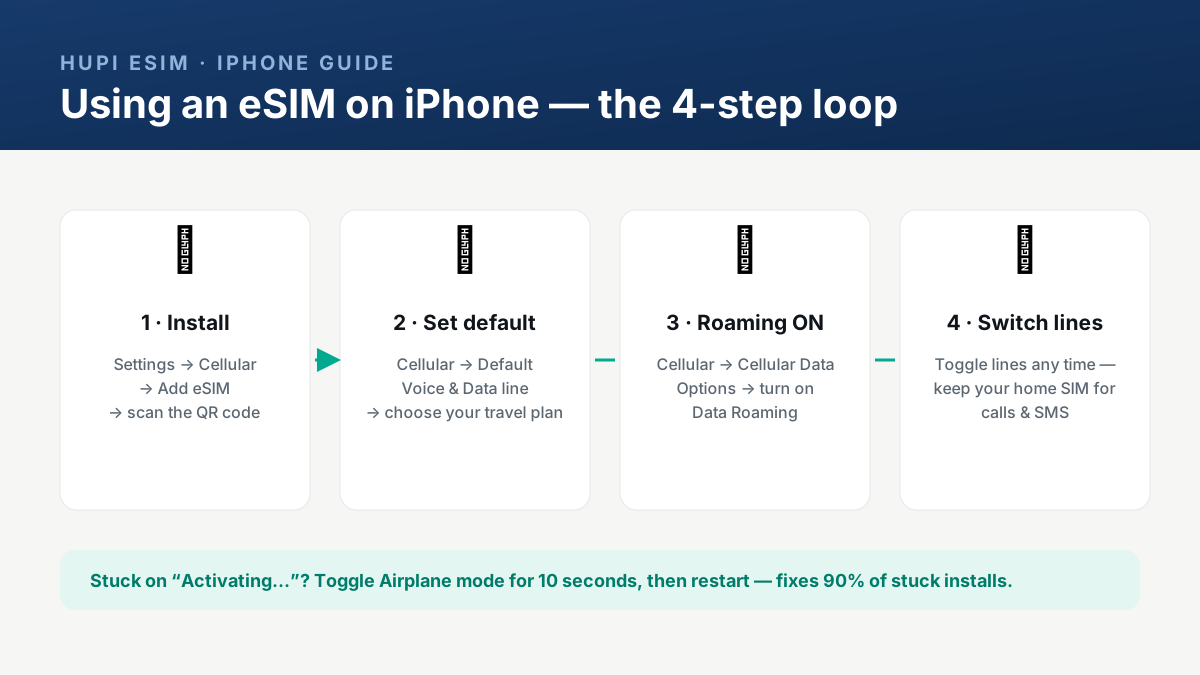
Where eSIM settings live on iPhone
Everything lives under Settings → Cellular (labelled Mobile Data or Mobile Service in some regions):
| Setting | What it does | |---|---| | Add eSIM | Installs a new plan from a QR code or manual code | | Cellular Data | Chooses which line uses data — pick your travel eSIM abroad | | Default Voice Line | Which line makes calls by default | | Cellular Data Options → Data Roaming | Must be ON for the eSIM to work abroad | | Turn On This Line | Enables/disables a plan without deleting it |
How to add an eSIM on iPhone
- Open Settings → Cellular → Add eSIM (older iOS: Add Cellular Plan).
- Your camera opens — point it at the QR code from your order email.
- Tap Activate and wait for "Tap to continue" or the plan label screen.
- Choose Secondary when asked how to use the line (keeps your home SIM as Primary).
- Set Cellular Data to the new plan and turn Data Roaming ON when you land.
How to scan an eSIM QR code properly
- Hold the phone 15–20 cm from the code in good light.
- Scan from the email on another screen or a printed copy — both work.
- Damaged code? Tap Enter Details Manually and type the SM-DP+ address and activation code from the same email.
- Never scan the same QR twice for a fresh install — codes are single-use; request a new one instead.
Using Dual SIM: keep your number, use travel data
The most common setup for travelers:
- Primary (physical SIM): calls, SMS and banking OTPs from your home number.
- Secondary (eSIM): data abroad.
Switch which line eats data under Settings → Cellular → Cellular Data. When you return home, just flip data back to Primary — or Turn Off the travel line entirely; it stays installed for your next trip until its validity ends.
iPhone stuck on "Activating"? Fix it in 3 steps
- Toggle Airplane Mode for 10 seconds, then off — resolves most stuck installs.
- Restart the iPhone and check the line again under Settings → Cellular.
- Still activating? Make sure you're on Wi-Fi (profiles download over the internet), confirm the phone is unlocked (Settings → General → About → Carrier Lock), and verify Data Roaming is ON after arrival.
If a plan shows "Unable to Activate" repeatedly, contact the provider — the profile may need to be reissued with a fresh QR code.
Managing and deleting eSIM profiles
- Rename lines: Settings → Cellular → tap the plan → Cellular Plan Label — useful with multiple travel plans.
- Delete a plan: tap the plan → *Delete eSIM_ — frees a slot. iPhones store multiple eSIMs (only one active for data at a time).
- Transfer to a new iPhone: Settings → Cellular → Add eSIM → Transfer from Nearby iPhone, or reinstall from the provider's fresh QR.
FAQ
Can I use two eSIMs at once on iPhone? iPhone 13 and newer can have two active eSIMs simultaneously; older models (XS–12) allow many stored plans with one active eSIM plus one physical SIM.
Will adding an eSIM remove my physical SIM? No. Lines coexist — you choose which is active in Settings.
Does turning off the eSIM line stop data usage? Yes. "Turn Off This Line" halts that plan completely until re-enabled.
Where do I find the eSIM QR code again? In your order confirmation email. Hupi eSIM also lists your plans in your account page.
Ready for your next trip? Browse eSIM data plans by destination →